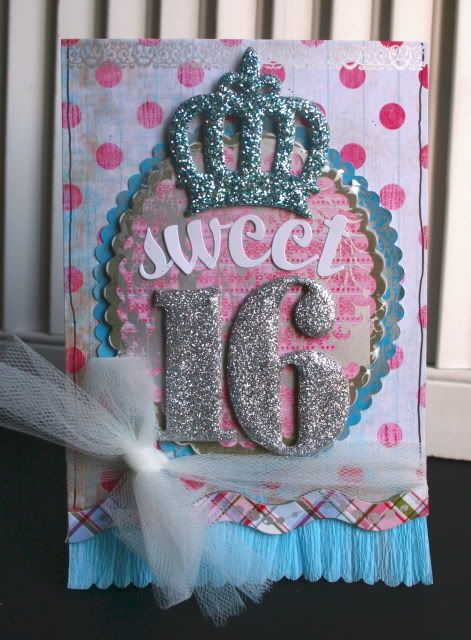
 Saturday, besides being my girls Ice Skating Birthday party is also World Card Making Day! Who knew! So in celebration of that Pink Paislee is doing another blog hop. No prizes being sent out this time but lots of pretty cards with instructions!
So...I do a lot of scrapbooking, altering etc...but I am not a very talented card maker. This I know. I even try to psyche myself out and pretend like I'm doing the cover of a mini album. Not working....but today I just used the elements that are my favorites right now (glitter and tulle)....and are my staples(Pink Paislee and Maya Road)....and went for it.. I could think of worse things to do on any given afternoon.
So, come and visit the Pink Paislee Blog for sneaks and links to all our DT members cards and blogs...they all have full instructions on them...just follow the links!
So for the Pink Paislee Card Blog Hop we are supposed to write instructions...so here goes.

Supply List-
Silver Berry Pixee Stix by Pink Paislee
Blueberry Pixee Stix by Pink Paislee
Pink Paislee Pop Fashion Shapes Topsiders
Office Lingo Lunch Hour paper by Pink Paislee
Vintage Moon- Moon Glade paper by Pink Paislee
Fashion Script Alpha-white by Pink Paislee
Pop Fashion Accents-Metallic Silver pressons by Pink Paislee
Vintage Moon Accents-Metallic Silver Pressons by Pink Paislee
white tulle
aqua crepe paper (from party supply)
stapler
Maya Road chipboard numbers
Maya Road crown
Glue made for glitter
Fabri-Tac
Scallop Scissors
black pen
Instructions-
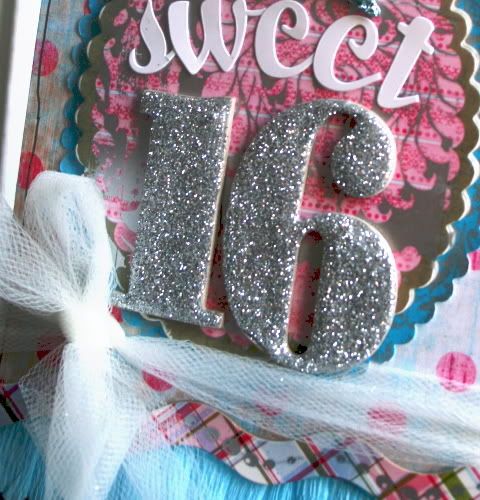
1) Using glitter glue, cover crown and the number 16. Sprinkle glitter on top (Silverberry for 16 and Blueberry for the crown), shake off excess and set aside to dry.
2) Cut a piece of Office Lingo Lunch Hour paper into a 6 x 4.5 inch rectangle. Fold in half.
3) Cut a strip of the aqua crepe paper. Fold it into pleats (for the life of me, I can't think of a better explanation for this) and staple in place. Once you have a line of it, trim to fit card width. Adhere to bottom edge of card with Fabri-Tac (or whatever your favorite adhesive is). Once you have it in place, use scallop scissors and trim bottom.
4)Adhere Topsider border to the line where the paper meets the crepe paper ruffle.
5)Mount Topsider oval scallop shape on top of a piece of Vintage Moon-Moon Glade paper. Adhere lightly, and trim around edge with scallop edge scissors. Once trimmed, glue all the way down to Moon Glade paper shape. Glue whole scallop oval piece to center of card.
6)Outline outside edge of card with black pen.
7) Using silver pressons, embellish topsiders and top border of card.
8) Adhere crown and 16 glittered chipboard pieces to topsider, being sure to leave enough space for "sweet" letters.
9) Apply letters to spell "sweet" in between glittered pieces at a slight curve.
10) Tie tulle bow around bottom of card.
11)Add paper strips on inside of card to cover staples.
Done!
too cute, Katie! Love that little crown on top!!
ReplyDeletethis is GORGEOUS ~ love it!!
ReplyDeleteBeautiful card Katie! Thanks for sharing!
ReplyDeleteHappy WCMD!
What a gorgeous card Katie. Love it :) Happy WCMD.
ReplyDeleteI'm lovin' this card. Super girlie!
ReplyDeleteSuper cute, Katie! Love the crepe paper ribbon at the bottom.
ReplyDeletewell of course it's darling...LOVE it!!
ReplyDeleteThis is just gorgeous, Katie! I love the crepe paper along the bottom and that cute crown!
ReplyDeleteVery sweet! I love how you did the bottom!
ReplyDeleteWow am I in love with that silver glitter! Great look!
ReplyDeletekatie,
ReplyDeletewill you be doing the book on the Pink Paislee website as a class? Hopefully!!??
titancupcake@gmail.com
Adorable! Love it, Katie!
ReplyDeleteKatie the card is wonderful....I even had a go of this challenge (I struggle with cards!!) Thanks for the inspiration
ReplyDeletesarah
so pretty n girly girl!! love it!
ReplyDeleteYou find the best stuff. I love the sweet 16!!!
ReplyDelete~Evelyn~